Back in November, I took a brief introductory cheese-making class. It was a two-hour whirlwind, culminating with twenty-five of us standing around six burners making mozzarella in groups of four or five. Chaos! And wouldn’t you know, I forgot to package my little piece of mozzarella properly, and forgot to eat it that night, so I never got to try it. The next day, it was hard as a rock. So, a few months later when the holidays had wrapped up and I decided to try cheese making on my own, mozzarella was the first thing I wanted to experiment with. Little did I know that mozzarella is actually not considered a beginner’s cheese. Nonetheless, I was pretty satisfied with the results, and I wouldn’t dissuade anyone from trying it as their first cheese. That being said, in my subsequent cheese adventures, I’ve backtracked a bit and made some simpler cheeses. Several batches of cream cheese (well, technically Neufchâtel, as I didn’t add any cream); queso blanco; and most recently, cottage cheese.
Supposedly cottage cheese, anyhow. I’m very picky when it comes to store-bought cottage cheese. I like it to have a clean mouth feel. I hate it when it’s cloying. I’ve never found out why it has, or doesn’t have, that cloying quality. I thought it might have to do with the fat content, but I haven’t actually noticed a correlation in the various cottage cheeses I’ve bought. Reluctantly, I try to simply stick to the brands that I know I like. This means I’m kinda at a loss when it comes to making cottage cheese that has the texture I want. The recipes I’ve found online usually have cream added at the end. Some don’t, but then you’re basically making queso blanco all over again (so it seems). When making my first batch of cottage cheese, I decided to split the difference, fearing that adding a hearty portion of cream would result in a cloying cheese.
My cottage cheese turned out tasting, well, not much like any store-bought cottage cheese I’ve had, cloying or not. The texture was completely different. So was the flavor. I’m humbled by my apparent lack of knowledge of fresh cottage cheese; frankly, I don’t know what variables to change to get the cheese I want, especially since I don’t know how different homemade cottage cheese is supposed to taste than store bought, anyway. (The internet says it’s supposed to be different. So who knows if I can even achieve something like the store bought cottage cheese I like – or if I should even be aiming for that. “Should” – as if hobbies are any fun when they’re prescriptive!)
Enough talk. Onto the process and pictures!
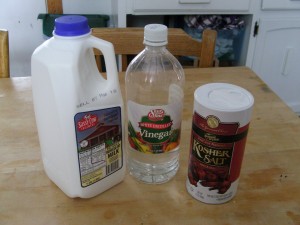
Ingredients: Milk, white vinegar, salt. Most recipes I’ve seen for home cheese making call for a gallon of milk. I’ve found that this usually makes a lot of cheese. If you’re going to be feeding it to a lot of people, great! But if you’re making fresh cheese, and it will only be consumed by one or two people, you might want to cut your batch in half. This is a half-gallon of 2% milk. (You can use whatever fat content you want. Obviously, fattier milk will make a richer cheese.) Local, pasteurized (not ultra-pasteurized), non-organic (I was saving money that day), homogenized. (Your ideal cheese-making milk is minimally pasteurized (or raw, so I’m told, if you can get it) and non-homogenized.)
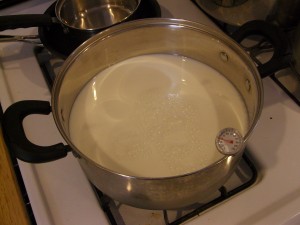
Heat the milk up to 120°F. I’ve got a dinky analog thermometer in my milk, as you can see. It works okay. A digital one might be better. I have a digital thermometer, but it’s a candy thermometer that doesn’t go below 100°, and many cheeses require you to do things below 100°, so I use this analog one for cheese. You can get a digital one that goes lower. Someday, I will.
Take it off the heat after it reaches 120°, and add 3/8 cup vinegar. Stir for a minute or two. You should see the whey appear – the kinda gross-looking greenish clear liquid. Then put a lid on it and wait for half an hour. During this time…
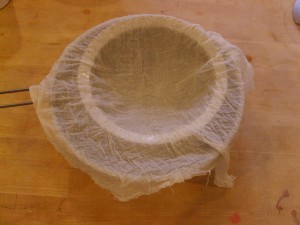
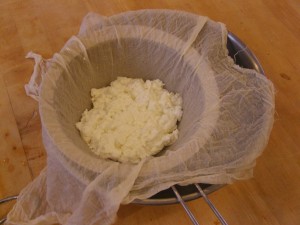
Set up a large-ish bowl with a strainer over it, and line the strainer with a large piece of cheesecloth. Don’t be cheap and use a small piece of cheese cloth. I learned this the hard way. You don’t want to have your cheese start coming out the sides of your cheese cloth bag later. Also, I hear that butter muslin is way better for actually straining cheese than cheese cloth (the stuff called cheese cloth is better suited to wrapping up hard cheeses). Unfortunately, I haven’t seen butter muslin at any stores I’ve been to yet, so I’ve been sticking with cheese cloth. And it works decently. You might want to double it, especially if yours has a loose weave. You can get butter muslin on the internet, which I’ll probably do soon.
Since that won’t take half an hour, I recommend now playing with your cat or doing some dishes while you excitedly watch the clock.
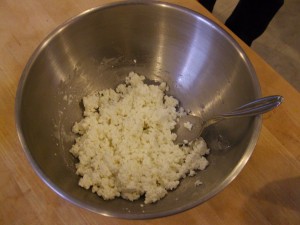
Now, ladle your curds carefully into your draining setup. Let the whey drain into the bowl for about three minutes. Then pick up the cheese cloth and tie it into a bag that holds the curds. Run under cool water for another two or three minutes, mushing the curds around with your fingers the whole time, trying to keep them broken up. Untie the bag and release your curds into a bowl…
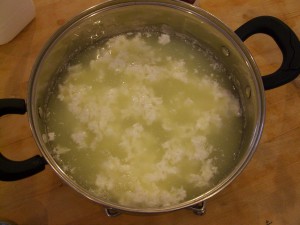
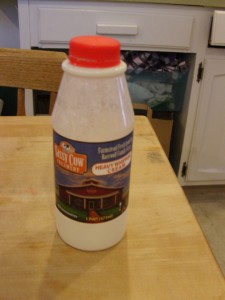
Here they are! Your very own curds! Actually, this photo is a little misleading. This is after I added the cream, which is the next step. I took pictures both before and after, but they looked almost identical, so I figured you didn’t need to see them both. Here’s a gratuitous picture of the cream I used:
Sassy Cow cream. I love Sassy Cow. They’re a very, very local dairy here in southern Wisconsin. They have a lot of organic products, but they also have some of their items in a less expensive non-organic version. I am all about buying organic when I can afford it; but if I can’t, I’d rather buy non-organic from a friendly local dairy than non-organic from a large faceless corporation. Also, Sassy Cow makes amazing ice cream. And they are not paying me to say any of this.
So, anyway. Before adding your cream, mix in salt. Then add cream (if you want). I added a couple of tablespoons. You can add however much you feel like.
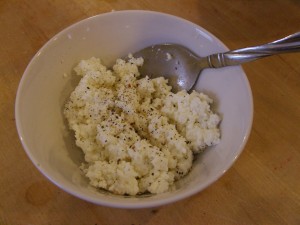
Now, the best part: Put some of your cheese in a bowl. Top with pepper, like I like to do, or mix with whatever you want. YUM. It may not taste anything like store bought cottage cheese, but it is fresh and delicious. Enjoy!
Cottage Cheese
Adapted from several internet recipes, including Alton Brown’s.
- 1/2 gallon milk
- 3/8 cup white vinegar
- 3/4 teaspoons kosher salt
- 3 tablespoons heavy cream
Pour milk in a large stockpot and heat to 120°. Remove from heat and add the vinegar, stirring for 1 to 2 minutes. Cover and let sit for 30 minutes. Set a cheesecloth-lined strainer over a bowl. After the 30 minutes have passed, ladle the curds into the cheesecloth and let drain for 3 minutes. Pick up the cheesecloth and tie it so that the curds can’t get out. Run the cheesecloth bag under cool water for about 3 minutes, until cool, squeezing and moving the curds throughout so that they stay separated. Squeeze the curds dry, and empty them into a bowl. Stir in salt and cream. Serve as desired!
You can use the leftover whey for various purposes. I made soup with the whey from my first batch of mozzarella. Then I had some gastrointestinal problems, so I’m thinking I might have a slight lactose intolerance (lactose gets concentrated in whey; that’s why some lactose intolerant people can still tolerate cheese; the whey has been drained away). Thus, I don’t save my whey anymore. If you have a garden (I don’t), you can water certain acid-loving plants with it, or so I’m told. Apparently you can also feed it to your pigs. If you don’t have a problem with lactose, whey does make a lovely soup base, or you can use it as a liquid substitute in other recipes.
Nice work. Those pictures are great!
Woo-hoo! Nicely done. You write well, conversationally and clearly at the same time. Great photos. I am not fond of cottage cheese — neither the texture nor the taste. But perhaps homemade would be a whole new adventure!
By the way, do you subscribe to cousin Sarah’s blog? You might enjoy being on each other’s email lists!
Thanks, Emily! Mom – thank you also! I don’t subscribe to any blogs (never looked into what that entails, but I should), though I do keep up with Sarah’s (and have a link on my sidebar!).