Feeds:
Posts
Comments

By popular demand…

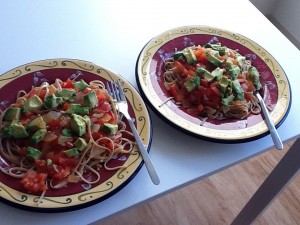
This is a guest post submitted by my boyfriend, Tyler. I’ve talked up his famous avocado pasta to a lot of people, and I recently posted a photo of it on Facebook, which was met by many requests for the recipe. Tyler has graciously written it up for the sharing. Enjoy!

Tyty’s Avocado Pasta

by Tyler Frawley

Ingredients

Pasta of your fancy (though I love it with whole wheat linguine)
1/2 onion, chopped
3 garlic cloves, minced
Olive oil
5-6 Roma tomatoes, diced
Salt
Pepper
Oregano
Red pepper flakes
1 avocado, diced
Lemon juice

Directions

Saute onion, garlic, and olive oil in pan over medium heat for 5 minutes. Add salt, pepper, oregano, and red pepper flakes to taste. Stir in tomatoes and let sauce cook for additional 8-10 minutes, stirring occasionally.

Top pasta with sauce and add avocado and finally lemon juice to taste. Enjoy and follow up by playing some Starcraft with Tyler (Thelonious.918).

Week One, in Sum

I baked SO MUCH BREAD this week! One of my classmates said that the week flew by for him. For me, it seemed to go on forever – not really in a bad way, though. I just kept having a feeling that I’d forgotten to do something that I had planned…for this weekend. And then I would realize that it was still the school week and the weekend hadn’t happened yet. We just did so much that it’s amazing to realize it was only the first week.

Broadly speaking, here’s the summary of what we did and what I learned:

We learned the basic function of (baguette) ingredients and environmental conditions, and we learned baker’s math; that means we can make and alter formulas on our own. Using formulas to bake bread basically means that you’re baking by ratios instead of by recipes. If you know how to use each ingredient in your formula, you can easily adjust for conditions you want to change. For example, if you find that a certain brand or type of flour makes your bread too elastic, you’ll have the problem (which we ran into) that, when you go to shape it into a baguette, you roll it out long…and then it springs right back into a shorter shape. Grr! Frustrating! Well, there are several ways to counteract this, one of which is increasing hydration – the amount of water in the formula. So, the next day that we used that flour, we added more water. This can be represented by the percentage of water indicated in your formula, and if you take good notes, you’ll know that whenever you use this flour (assuming all other conditions are the same), you’ll also need the greater percentage of water. (As it turns out, simply increasing the water wasn’t enough to really fix this dough, but I shan’t delve any further into that particular issue right now. If you’re interested, let me know in the comments, and I can review my notes and try to expand.)

We learned the procedures and techniques for mixing baguette dough in a large spiral mixer, proofing it (letting it rise), folding it (to increase strength – almost like a little tiny mini-kneading), pre-shaping it, shaping it, scoring it, and baking it. This includes using the big scary deck ovens I mentioned in my previous entry. They’re really not all that scary, as I suspected. They are a little cumbersome, though. There’s a big loading belt that requires some upper-body strength to operate; I’ll get better at that, I suppose.

We practiced making baguettes using three distinct formulas, for a “short mix,” an “intensive mix,” and an “improved mix.” These have slightly differing ratios of ingredients, and widely varying mix times and proof times. A short mix baguette is what you’d essentially be making if you made baguettes without a machine – relatively gentle mixing, for a relatively short amount of time, but long rise times. The baguettes come out smaller overall, but with a more open, airy interior. And more flavor! An intensive mix baguette is on the opposite end of the spectrum – you mix for a long time, and it proofs for a short amount of time. This is a stiffer dough that would be much harder to mix aggressively by hand; this technique became popular post-industrialization, when people invented machines that could do the hard work. This makes a large baguette, but the crumb is very tight, and the flavor is lacking. This technique is much better for a type of bread that is meant to have a tight crumb, such as challah or bread baked in loaf pans. These breads often have other ingredients lending flavor, too (like eggs or fat). Anyway, the improved mix is a happy medium between these two – a nicely sized, open-crumb, reasonably full-flavored baguette without too much time spent proofing.

We also learned how to shape batards, which are like shorter baguettes, somewhat football-shaped. We used essentially the same dough as we did for baguettes. Mostly, though, we did baguettes, and I’m glad – I need all the practice scoring them that I can get! Scoring is cutting the lines that run diagonally down the length of the baguette – they are pretty, but more importantly, they are functional. Bread rises one last time when it first enters the oven, and scoring the bread helps it do so evenly and fully. Scoring baguettes is particularly challenging; there are all these things you have to keep track of in order to score just right, and yet you’re supposed to do it quickly or your blade will drag. Anyway, our instructor has critiqued loaves each of us has made at the end of every day, and it is very clear that we’ve all improved a ton over just five days. Even still, many of us are talking about wanting to go in on Saturdays (we can do this, optionally) for extra practice. It’s cool to be part of a group that’s so eager to learn and do well!

Without further ado, here are some pictures.

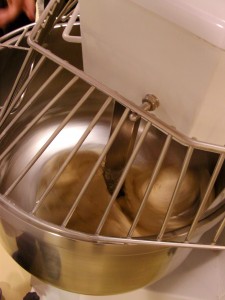
Dough in the mixer

Pre-shaped baguettes. These will rest briefly, and then be shaped into the final baguette shape before being scored and baked.

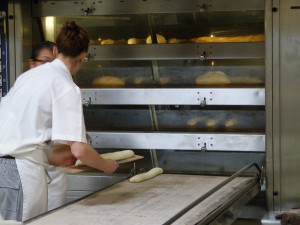
Putting baguettes onto the belt to load into the oven

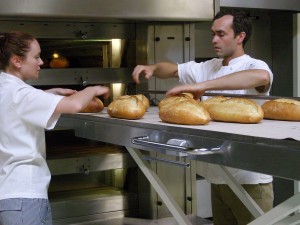
Pushing the belt forward to load the oven with scored baguettes

Checking batards to see if they’re ready (or maybe just checking to see if they’re ready for the next stage of baking, with the oven vented)


Racks full of cooling baguettes

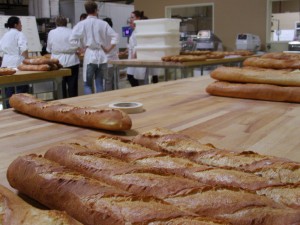
Baguettes on workstations at the end of the day, awaiting critique!


Home from my first day of baking school! So exciting and overwhelming! We are a group of 15, coming from as close as San Francisco and as far as Australia. Several of us from out-of-state have connections to the bay area (like me), but for some, it is their first time here. People are staying with in-laws, or in in-law units, or in rooms in a house, or in apartments. As far as I can tell (though I’m not positive about this), I think I’m the only one who isn’t from the area but is renting an apartment semi-permanently — that is, with a lease that extends beyond the duration of the program. Anyway, on to BREAD PHOTOS!

Or Bread Photo, at least. This is all I’ve got to offer you for now. These are my first baguettes. From what I can tell, we’ll be doing baguettes all week, so you should be able to see me improve (let’s hope!). Actually, I’m reasonably proud of how these turned out, but I know I’ll be getting plenty of practice over the next couple of days to perfect my technique. Today, our instructor mixed the dough and we watched, and then got to each shape our own loaves. Tomorrow, I believe, we’ll be working in small groups to try out the mixing part on our own. That part I’m excited about. I’m a bit apprehensive about the part where we load breads into the GIGANTIC HONKIN OVENS…and those of you who’ve seen my last workplace know that I’m no newbie to big ovens, but for some reason (maybe just unfamiliarity?) these huge deck ovens are much more intimidating to me than our walk-in oven was at the co-op. Now that I think about it, though, I think I was scared to use that one for the first week, too, but quickly got over that.

Right, didn’t I say “on to Bread Photo” a while ago? Ok, ok, here we go!

Yum. They say we’ll get sick of eating baguettes. WE’LL SEE ABOUT THAT!

Long time no blog

Hello all! Good to see you again. Been a while since my last post. Life has been very busy! I have big news! Starting next month, I will be attending baking school at the San Francisco Baking Institute. It’s an eighteen-week program, and I will be relocating to the Bay Area for it. (Tyler’s coming too! To SF, not to baking school – he’ll be barista-ing!) This is obviously a huge change, and everyone’s been asking me if I’m excited — I think I’ll start feeling excited once the drudgery of moving is over. Also, this is a bittersweet move, as Madison is a place I’ve truly grown to love, with people I will dearly miss. As of now I have no plans to move back to Madison or the midwest, though it’s certainly possible it could happen down the road. This is a very difficult parting. That being said, I’m going to California, where (all within the past year) my entire immediate family has also relocated to. And I have extended family there, too. I was born in the bay area, and my family lived there til I was 6; when I was 14, I moved to southern California for boarding school (my own choice!). Geographically, my life can be roughly plotted out as moves back and forth between California and the midwest. CA, KS, CA, MN, WI, and now CA again. Where will I end up long-term? Who knows. I have strong loves for both areas. I would also love to live on the east coast someday, and I adored my semester in Glasgow, Scotland, though Europe is awfully far away. Right now, the west coast beckons. I love the idea of (when I someday own a house) having fruit trees in my backyard, having milder weather after nine years of upper-midwest winters and a similar number of summers. And I love the innovative feeling of coastal U.S. cities. On a trip to Washington, D.C. and Baltimore a few years ago, I saw my first cupcake shop. Cupcakes were in full swing there, but it wasn’t until after I went on that trip that Madison’s first cupcake shop opened. I’d like to be in a trend-setting environment — not to say that trends are never started in the midwest (and I think it’s good and important that creative and innovative people are in the midwest creating and innovating, which they are! especially with regard to food in Madison), but it just feels like the atmosphere for innovation is so ripe on the coasts. I’m excited to see what that’s like.

Anyway, I wanted this post to get to bread eventually! I’ve been baking less as I’ve been dealing with the logistics of a cross-country move (and because it’s been blazingly hot), but what baking I’ve been doing has been mainly in the area of sourdough. Towards the end of April, I decided to try my hand at making my own sourdough starter…and somehow, the thing came to life and grew! The starter has given rise (ha) to several successful loaves of bread, one failed batch of onion rolls, and a couple of delicious batches of sourdough pancakes. I’m loving the magic of sourdough; I think fermentation in general holds a special intrigue to me. Fermentation happens in all bread baking, but it’s most obvious in sourdough, where you can bake loaves of bread to which you add no commercial yeast at all! It’s amazing! Cultivating the yeast that already lives in your environment, harnessing its power and watching it leaven bread. Wow. I definitely want to learn more about fermentation — with my other hobbies including cheese making and mead making, I’ve realized this is a common thread.

For now, here are a few photos of sourdough creations:

The next few weeks will be filled with sorting, packing, apartment-hunting, and the actual move, so I don’t know how soon I’ll be able to post next – but I hope to have many enthusiastic posts about my adventures in baking school when my program begins!

French bread

One of the bibles of bread baking is The Bread Baker’s Apprentice (Amazon affiliate link there, folks). I would love to master everything in this book. As it stands, I have humbly tried my hand at a few recipes, and had them turn out decently. Not the works of art I want, but that will come in time. For now, I’ve got delicious loaves of bread. Today, I made the French bread recipe.

It uses a starter (called pate fermentee) that the author suggests starting the night before; you’re to let it rise slowly in the refrigerator. However, he mentions that you can use it the same day; instead of a one-hour rise before chucking it in the fridge, you just do a two-hour rise at room temp. That’s what I did.
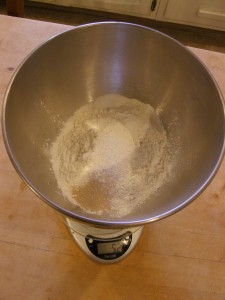
Dry ingredients: bread flour, all-purpose flour, yeast, and salt.

First, you measure out your dry ingredients. Then, add water. I accidentally added too much water. Folks, make sure to check your 1/4 cup measuring cup is not suddenly a 1/3 cup measuring cup.

Pate fermentee in the mixer

So, this is a little on the sticky side compared to how I think it was supposed to be. I went with it, though.
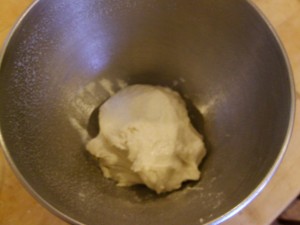
After about 4 minutes of kneading in the stand mixer with the dough hook (not pictured), it was ready to rise

Cover with plastic wrap, and fast forward 2 hours…
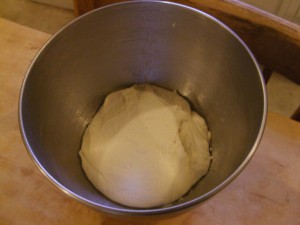
Voila!

Now, you do the strangest thing: cut the starter dough up into chunks, and add it to another round of all the same ingredients you used the first time, in the same quantities. Basically, you do the whole thing over again, except you’re adding in chunks of this first round of dough. Yeah. Also, you use warmer water this time. And (if you’re me) you realize partway through that you’d been using the 1/3 cup measuring cup and not the 1/4 cup, so you use a more fitting amount of water this time.
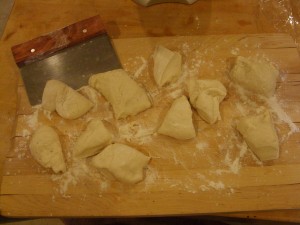
Chunks of the pate fermentee

Notice the bench scraper. This tool is awesome. I’ve seen them sold for $20+. DON’T FALL FOR IT! I got mine for about $2.50 at a local restaurant supply store. At least in my area, these stores are open to the public. Look into it. Some stuff they have (though not all) is quite cheap. Use this tool to cleanly cut soft stuff. Like dough. Or scrape stuff off of flat surfaces.
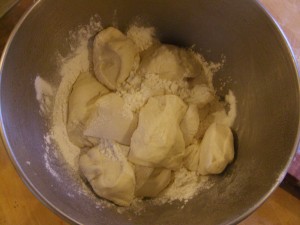
Dough pieces mixed in with dry ingredients

Weird, huh? You mix this all together and then add your water, and then use the dough hook to knead again. To tell if it’s done, you take a little chunk of the kneaded dough and stretch it out slowly, until you can see through it. If you can see through it without it breaking, it has passed the “windowpane test.” Mine didn’t do as well as I wanted it to, but I’d already kneaded it quite a bit past the amount of time it was supposed to take, so I went with it. The book claims it’s very hard to over-knead dough on home equipment, so maybe I should’ve just kept going.
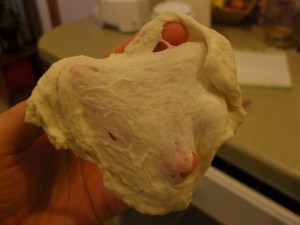
Stretching dough is fun.
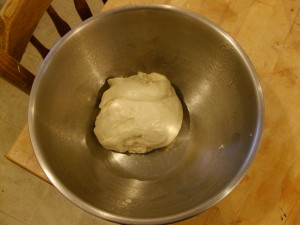
Ready to rise!

Now it gets to rise for a while.
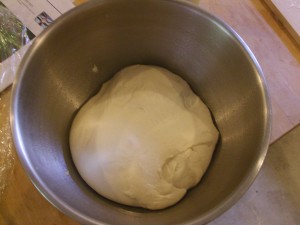
Risen!

Isn’t time-lapse photography great?
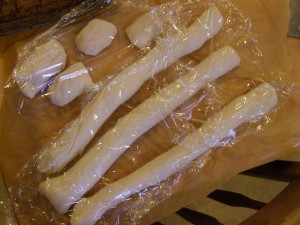
Shaped loaves

These are my loaves. I made them too long to fit on a sheet tray, so I cut the ends off and made little irregular rolls. Why not?! Anyway, you’re supposed to handle the final dough as little as possible – ever noticed the big holes you get in really nice French bread? those deflate if you’re too rough with the dough – so I figured I’d cut my losses (as it were!) and cut the ends off and throw ’em alongside rather than try to reshape everything.

Now, they’re going to rise a bit more.

Risen loaves

Now for the scoring! I need a lesson in this. My cuts in loaves aren’t as clean or deep as they should be. Scoring loaves helps them rise evenly in the oven (because bread does typically rise a little more at the very beginning of baking; this is known as oven spring) without bursting, and it makes them pretty.

Scored loaves, on baking sheet

These loaves are resting on cornmeal. They were rising on parchment paper, as you might have noticed, but I did not bake on parchment paper. Baking starts at 500°, and parchment paper is only rated up to 425°. Oven fires = bad.
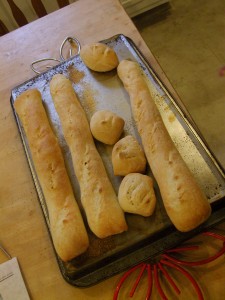
Baked!

For crispness and brownness of crust, this recipe has you imitate the conditions of a professional oven with a steam setting. There are a couple of ways to do this. The first way involves putting a deep pan in the bottom of your oven, before pre-heating it, and VERY CAREFULLY pouring water in the pan after it’s pre-heated, right before you put the loaves in. This scares me, and I don’t do it. The second way, which I do, involves spraying the sides of the oven with a spray bottle of water. You do a few sprays on each side of the oven (I do 7 or 8 on each side), then quickly close the door, then repeat at 30-second intervals, for a total of four spraying sessions. After that, you turn the heat down.

CAUTION: You must be very careful not to shatter the glass on the oven door or the light bulb in the oven. Be sure to avoid the light bulb, and you should place a dry towel over the glass of the oven door while you’re spraying the walls of the oven.

So, here’s the inside of one of my loaves:
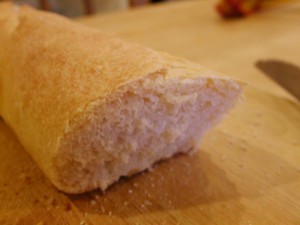
Bread!

Delicious! But no big holes. I must learn to handle the dough more delicately; and possibly, the rising didn’t go quite as exquisitely as it might’ve. There are so many variables in this process! But if I can get a bread that rises, and tastes good, I’m pretty happy. I look forward to baking bread professionally someday (we don’t do yeast breads at my current job), but til then, I’ll happily do my best at home, with my books. 🙂

As for the recipe: it’s really long, and I feel iffy about republishing it freely, as it goes into quite a bit of detail. If you’re interested, drop me a line, and I’ll see if I can help you out!
By matzah alone

Passover might be my favorite holiday. I can’t claim to be very religious, but I love the tradition, I love the way it brings family together, and I love the food.

In a holiday of many edible symbols, matzah might just be the biggest one. There are many symbolic foods consumed during the Seder, but matzah carries forward for the duration of the eight nights of Passover. I love that this holiday is so much about bread.

For the uninitiated, matzah (or matzo) is unleavened bread – essentially, a cracker. As the legend goes, the Jewish slaves fleeing their Egyptian captors had to leave on such short notice that they had no time to wait for their bread to rise, and instead had to bake it immediately in the sun. It isn’t the tastiest thing ever – but it isn’t supposed to be. Our ancestors sacrificed perfect bread for freedom.

Hmm. As a baker, how does this make me feel? I’m as big a supporter of good bread as the next person, but this sacrifice was obviously a no-brainer. And so, maybe what I need to remember is this: it is a privilege in my life to be able to dedicate so much thought, time, and effort to the pursuit of good bread. There have been, and will be, times in many people’s lives when good bread (or any bread at all) has to go to the back burner, when more pressing issues come up. I believe good bread can make a positive and meaningful difference in people’s lives, but I also recognize that it’s a luxury. We could live on matzah alone. We are fortunate whenever we don’t have to, and we should not forget those who did, do, and will.

Granola Bar R&D

Warning: no actual recipe here. This is a work in progress, but I want to keep you in the loop…

I’ve recently discovered my favorite granola bars. They’re Cascadian Farm Granola Bars (disclaimer: that’s an affiliate link. I stand to make a tiny amount of money if you buy after clicking), and I’m pretty sure I know why they’re my favorite: brown rice syrup. Love it! One of the best-selling products that we make at work also uses brown rice syrup. On its own, it does have a distinctly rice-y flavor; in baked goods, it’s  sweet and complex and delicious, and not particularly rice-y. I’d never bought it for home use before, but I decided to change that, because I want to see if I can make something at home as delicious as the bars I buy.

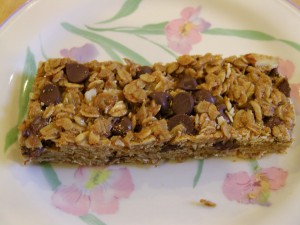
I made a batch the other day; and since I was using brown rice syrup (a good vegan alternative to honey), I decided to make them vegan. They’re good, but they could be better. I overbaked them – trying to compensate for our cool oven, but unfortunately, I over-compensated. Also, I was waiting for the bars to get brown, but I hadn’t considered that they were already kinda brown from molasses and wheat flour, so the change would be subtle. The overbaking would be easy enough to fix, but I also want to tweak some ingredients. So, I’ll be doing another batch another day. Here’s what I made this time:

And here’s how I’m going to change them:

  • More chocolate chips!
  • More almonds!
  • More brown rice syrup!
  • Maybe a little less Earth Balance
  • Add salt

…yes, on the whole, I’m going to make them less healthy…but more delicious. I see granola bars as a relatively healthy treat, not a health food per se. I know there are recipes out there for truly healthy granola bars. If that’s what I were going for, I’d probably leave out the chocolate chips altogether (or reduce them). What I want is something a little sweeter, a little more flavorful, and I think I can accomplish that without going totally over into junk food territory (and as you know, there are plenty of times I explore that territory). So, stay tuned…and in the meantime, tell me: what’s your favorite granola bar, and why?

Decadence

I grew up in an ice-cream-loving family. There were always multiple flavors of ice cream in the freezer, sometimes as many as five. And there was always a batch of my mom’s secret-recipe famous hot fudge sauce to put on top. The way I differed from the rest of my family was in the whipped cream department. The incredulity in my mom’s voice has not faded in the slightest; to this day, she marvels at how I didn’t like whipped cream as a child. When I was four years old, I wouldn’t touch it with a ten-foot pole. As I got older, I started taking it in small doses, a tiny little puff on top of my ice cream and hot fudge sauce. Never as much as everyone else, especially my brother, who was my opposite in this sense (the ice cream should be completely blanketed). Mind you, this was whipped cream from a can, but it was real whipped cream, not Cool Whip (my mom wouldn’t have stood for that).

When I got older, I discovered homemade whipped cream for the first time. And that might be the first time I actually liked it. It’s so different! I have been drinking my coffee with heavy cream lately (left over from my goat ricotta project), and last night I realized I could be drinking my coffee with whipped cream, so that’s what I decided to do today.

All you really need to make whipped cream is a jar to shake; but if you don’t have a ridiculous amount of time to kill and don’t want your hand to fall off, you’ll need hand beaters or a stand mixer. There are also fill-your-own whipped cream makers, similar to the kind you buy Reddi-wip in. I have one of these, but I’ll be darned if I was able to use it more than a handful of times before it stopped working and I couldn’t figure out why. Someday, maybe I’ll get it working again. For now, the stand mixer it is.

The great part of making your own whipped cream is that you can easily sweeten or flavor it any way you want. I decided to go deluxe with maple syrup.

This is just an ounce or two of cream. That’s what I had left. You don’t need much, if you’re just going to top one cup of coffee, but you do need enough so that your mixer whisk has something to grab onto. I whipped it a little while before adding the maple syrup, because I was afraid that the extra liquid at the beginning would prevent the cream from whipping up. This may be completely unfounded, but I figured it couldn’t hurt. I didn’t measure the maple syrup, but it was probably two or three teaspoons.

By the way, if you’re using a stand mixer, keep a close eye on it; if you leave your cream in there too long, you’ll end up with butter! The change can happen very suddenly. The more cream you’re whipping, the longer it will take to whip up. This amount whips up very quickly; if you’re doing a large batch, it’ll take several minutes, but once the volume starts building up, it’ll go pretty quickly.

This is looking good.

Yum…but, it needs something.

A sprinkling of cinnamon! Perfect.

I am drinking this now. Don’t even know if I’ll be able to finish it. Maybe that’s because when the first dollop of whipped cream melted, I added more.  And then more. It’s delicious! But yes, very rich for the morning. More of a dessert….mmmmm…and yet, I still have some left over. Hmm. Maybe I’ll save it to have on ice cream tonight.

Make goat ricotta! And then lasagna!

One of the perks of my job is that I get free past-date stuff. Typically it’s not even past a “use by” date, just a “sell by” date. Meaning it’s still perfectly fine; it just can’t stay out on the shelves. A couple of times recently I’ve found goat milk in the free bin. A few days ago, I got a half gallon, and decided to make it into a simple goat cheese. I looked into chèvre, and then found out that chèvre seems to require a special chèvre culture; or at least, some kind of bacterial culture you need to purchase specially. Meaning I couldn’t do it without further planning. And I didn’t feel like planning much more. So I flipped through my cheese making book for a recipe that allows for goat milk (a lot of them are written for cow milk, but say that you can substitute goat) that also didn’t require special ingredients. Aha! Ricotta! I did have to go to the store, but I didn’t have to hunt down specialty cheese-making cultures. And ricotta? Well, that would give me an excuse to make lasagna! So, I began…

Goat ricotta ingredients

Ingredients

Cream (cow), half gallon of goat milk, citric acid (I had this around already; bought on Amazon, but you might also be able to find it in a grocery store), salt

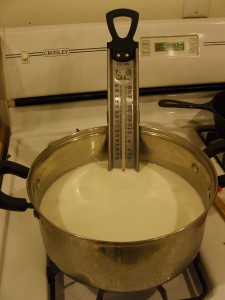
Ingredients in the pot

All together now...

Unlike in the cottage cheese recipe I shared, all the ingredients go together in the pot at the beginning. As the mixture gets up to temp, the curds and whey will begin to separate (instead of you adding the acid after the milk is already up to temp). I don’t know why one makes some cheese one way and others the other. I have so much to learn!

I took some pictures of the curdled mixture still in the pot, but the curdling was so subtle that I don’t think sharing the picture would be very enlightening. Both in this goat-cheese-making experience and my one previous experience, the curds and whey separated a lot less distinctly than they have with cow milk. Also, this time, I forgot to increase the amount of citric acid as the recipe suggested if using goat milk. That might have made the curds more pronounced. It still worked out okay.

Curds in strainer

Curds draining

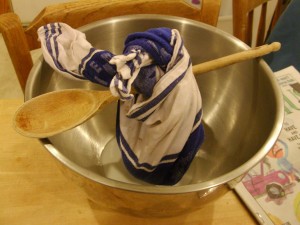
I decided to try the dishtowel method of draining curds instead of cheesecloth this time. In retrospect, I probably should not have used a dishtowel that smelled like laundry detergent, but the cheese didn’t seem particularly floral in the end, so I think it was okay. 😛 This is a dishtowel inside a mesh strainer over a big bowl.

Draining setup

Draining for another little while...

The curds get to sit in a towel-bag (or cheesecloth-bag) at room temperature for 20-30 minutes. Or at least, that’s what the recipe says for baseline ricotta. The drier you want your ricotta, the longer you let it drain (makes sense). I think if I were to do it again, I’d let it drain a little less.

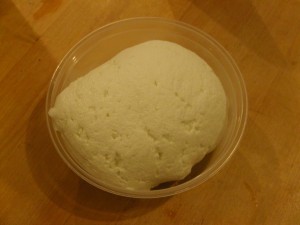
Ricotta

Ricotta!

Fresh out of the bag! I got about 11 oz.

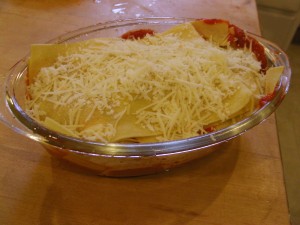
Lasagna

Lasagna

I made a simple small lasagna (based off a Joy of Cooking recipe) using fresh noodles from a local company (RP Pasta), spaghetti sauce, mozzarella (not homemade), Parmesan (definitely not homemade), and the goat ricotta. I wanted to keep the non-ricotta ingredients in the lasagna very simple, so as to showcase the ricotta. This seemed to work; the goaty flavor came through!

Baked lasagna

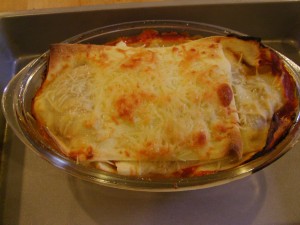
Baked lasagna!

And it was tasty. 🙂

Whole Goat Milk Ricotta

Adapted from Artisan Cheese Making at Home by Mary Karlin

  • 1/2 gallon goat milk
  • 1/4 cup heavy cream
  • 3/4 teaspoon citric acid powder (I accidentally used only 1/2 teaspoon)
  • 1 teaspoon kosher salt

In a large stockpot, combine the milk, cream, citric acid, and 1/2 teaspoon of the salt and whisk together thoroughly. Slowly heat the milk to 185°-195°F. This should take about 15-20 minutes. Stir frequently with a rubber spatula to prevent scorching. Curds will start to form as the milk gets up to the correct temperature. When the curds and whey separate and the whey is yellowish-green and slightly cloudy, remove the pot from the heat, and run a rubber spatula around the edge of the curds to rotate the mass. Cover the pan and let the curds set without disturbing for 10 minutes.

Ladle the curds into a cheesecloth- or dishtowel-lined strainer that’s sitting over a bowl. Add the remaining 1/2 teaspoon of salt and gently toss to incorporate. (The recipe says to use your hands. I used a spoon, because the curds were too hot.) Be careful not to break up the curds in the process.

Knot the corners of the cheesecloth or dishtowel around a wooden spoon, and perch this over your bowl (or a bigger bowl if necessary), and let the whey drain for another 20-30 minutes. Less if you want a moister ricotta, more if you want a drier one.

Keep refrigerated in a covered container for up to a week.

You gotta start somewhere

Before I begin: I hope this post doesn’t come across as whiny or entitled. Experience is a valuable thing, and often genuinely mandatory. The breadth and depth of experience someone has in any field can make a huge difference in their contributions. My main point in this rant is that I think it unfortunate when people without experience not only aren’t given a chance in an entry-level position, but are led to believe their inexperience is a roadblock.

As someone who is just starting to figure out what she wants to do with her life, I’ve admittedly found myself daunted by the requirements listed by some employers. Must have five years’ technical writing experience. Must have a marketing degree. Sometimes, the job posting will say “Degree in XYZ preferred,” rather than “required.” That’s my in. I think it’s the in for a lot of people. I’m grateful for employers like that, and I wish there were more of them.

That being said, I recognize that sometimes a company is just not in a position to do on-the-job training. Even if they don’t need someone with lots of experience, they want someone who is well-primed for the opportunity. Maybe they have so many candidates (I bet this is true especially in the current economy) that it seems like a no-brainer to hire the person with five years’ experience rather than the one who is eager to learn, and so they don’t even bother looking at applications from less-experienced people. Okay. I can understand that. I might not like it, but I get it.

What I don’t get is when a job posting is condescending. I ran across one for a baking job recently that said something like “Casual home bakers need not apply.” The tone there just really riled me up. Who amongst us didn’t start as a home baker? How many home bakers will read that ad and form the (incorrect) impression that there’s no way to break into this field, and then give up? Me, I was lucky enough to find my first kitchen job (working for a chocolatier) when I’d had no professional experience; my second kitchen job, my current baking job, came to me when I’d had only one year of professional kitchen experience and none as a baker. Both of these employers recognize something important: if a person is capable of learning quickly, has a history of being a hard worker, and shows an interest in the work, they are likely to succeed. This, of course, does not mean that every job should be willing to hire someone without experience or certification. Certain things take too long to learn to be taught on the job. Baking, however, not only can be taught on the job, but typically is. Yes, some people go to culinary school – but formal education is less critical than, say, computer science coursework is for a software development job.

Therefore, I ask – how does this employer expect inexperienced bakers to break into the field? Maybe by first holding a different, lower-paying kitchen position? Maybe simply by first working for someone out there who is willing to take on someone with no experience? Probably, it doesn’t matter, since (one way or another) there are experienced bakers out there.

By the way, I do think it’s important for home bakers to realize that baking in a professional kitchen is very different, in some ways, than baking at home. Yet I think some people overstate the differences in an attempt to warn away those who are on the fence. Yes, I lift 50-pound bags of flour and sugar every day. Yes, I am on my feet the entire workday (got used to this much faster than I thought I would). Yes, I have multiple recipes going at once, and have to keep track of things in the oven at the same time as things in the mixer. Yes, there are days (today was one of them) when I have to challenge myself to work even faster than normal, when “normal” is so much faster than I used to bake before I did it professionally.

These are the kinds of things people will tell you to scare you off. They want you to know that baking for a career does not involve sitting down to read a book while waiting for your single tray of cookies to bake. They are correct. But there are other, sometimes richer, rewards. I’ve formed amazing friendships with my coworkers. I’ve gotten to work with ingredients, and learned techniques, that I never would’ve on my own. I get paid to bake. I go home every night knowing that the 12 bags of chocolate chip cookies on the shelf the next morning are there because of me. That the people who enjoy them will do so because I went to work the day before. This is such an amazingly rewarding feeling! It is certainly not the only reason I wanted to bake for a living, but it’s a big one. And in my opinion, finding out whether someone wants that feeling should be considered just as carefully in the hiring process as “Have you ever done this before?”

Older Posts »