Feeds:
Posts
Comments

Irish Brown Bread

This past week at work, we’ve been making a lot of soda bread and Irish brown bread in anticipation of St. Patrick’s Day. Tonight, I decided to make some of the latter at home. So far in this blog, the “or not” side of “bready or not” has been heavily represented; now, I finally bring you something bready.

The great thing about soda breads is that because they use baking soda for leavening, they’re instant gratification. Well, at least compared to yeast breads. (Can you have degrees of instancy? Or is something either instant or not? Anyhow…) No waiting for anything to rise.

The recipe I used is not the one we use at work, but it’s fairly similar. Whole wheat flour plays a big role, which endears it to me. I’m a big fan of whole grains. Good for you; good flavors. Not that I don’t also love a delicious baguette or challah, though.

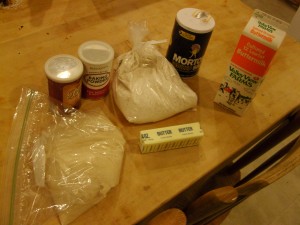
Ingredients

Ingredients

The recipe lists quantities for some ingredients by weight as well as by volume. If you have a kitchen scale, this makes things way easier! I didn’t need any measuring cups, and only needed measuring spoons for the baking powder, baking soda, and salt.

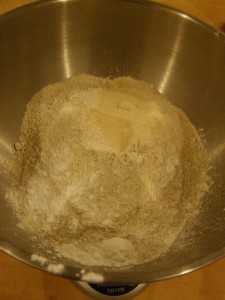
Get your dry ingredients together in a bowl, and give them a stir…

This picture is actually from before stirring.

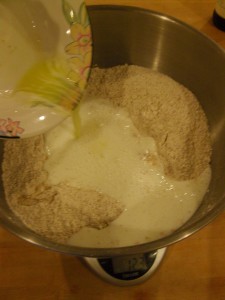
Add the buttermilk.

Then the butter…mmm.

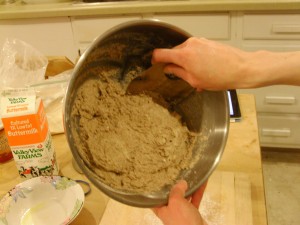
Stir that all together…

This dough came out reallllly wet.

If your dough comes out as wet as mine did, I recommend using a bowl scraper. Or whatever you can find to get that gooey mess out of the bowl.

Photo credit to Tyler.

Put it on a floured board.

Yeah. I was not sure how I was going to knead something of this consistency...

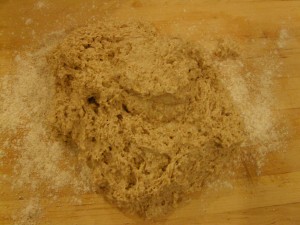
Knead briefly…if it’s un-kneadable, as it was for me, throw some more flour in there.

A *lot* of extra flour did the trick for me. Photo credit for awesome action shot goes to Tyler.

Shape into a round loaf and place on a lightly greased cookie sheet. Cut a deep cross into the loaf.

It's a loaf!

Bake at 400°F for about 40 minutes. You can test for done-ness with a knife in the middle of the loaf. It should come out clean. I turned the temp up to about 410° on my oven, cause it runs cold.

Baked loaf!

Garnish as you see fit.

With butter

Serve to people whose undying admiration and gratitude you desire.

This bread is Tyler-approved.

I used the recipe from King Arthur Flour pretty much as written, so the following is a direct quote:

4 cups (13 1/2 ounces) whole wheat pastry flour
2 to 3 tablespoons (7/8 to 1 1/4 ounces) sugar
1 teaspoon salt
1 teaspoon baking soda
2 teaspoons baking powder
1 1/2 cups (12 ounces) buttermilk
2 tablespoons (7/8 ounce) vegetable oil or melted butter (1 ounce)

In a large bowl, stir together the flour, sugar, salt, baking soda and baking powder. Make a well in the dry ingredients and pour in the buttermilk and the oil or butter. Stir together until blended—some lumps will remain. Turn the dough out onto a floured board and knead about 10 times, or until it all holds together. Form it into a large ball and place it on a lightly greased baking sheet. Cut a deep cross in the top. Bake the bread in a preheated 400°F oven for approximately 40 minutes, or until it tests done (a cake tester inserted into the center will come out clean.) Yield: 1 large round loaf, 10 to 12 inches in diameter.

Pour-over coffee

I’ve become a coffee drinker only in, oh, the past month or two. Why now? Well, my former-barista boyfriend has probably had some influence over me. Not that he’s a coffee-pusher, but seeing him drink coffee frequently has, I’m sure, had a subconscious effect. Oddly enough, when I first met him and he was working as a barista, I never asked him to make me coffee. Green tea lattes all the way! He’s working in a different field now, but still drinks coffee. And slowly, my own caffeine habits have gone from drinking tea and the occasional half-caff cup of coffee to making my own fully caffeinated coffee at home, and ordering lattes when out. I still love all sorts of teas, but I’m pretty excited about coffee these days.

I thought for a while about how I wanted to make coffee at home. I’ve used a French press before, and hate cleaning them. Plus, I never (yet!) drink more than one cup at a time. During a discussion at work, my boss suggested making pour-over coffee. All you need is a little plastic doohickey. You can make one cup at a time. That thought stayed in my mind for a while, and one day I picked one up. Wow! I love it! The simplicity is genius. I don’t know why I didn’t realize that all the modern-day coffee gadgetry we use is, well, not the only option. I am always interested in learning the simpler, more hands-on way of doing something, especially in the kitchen. I will use my stand mixer to knead bread dough when I don’t feel like kneading it by hand. But there’s something I love about doing it by hand, when I have the time. So it is with coffee. When I make coffee using a French press or an electric coffee maker, I don’t feel involved in the process. Pouring water directly over the grounds and watching it drip through? Awesome.

As I started doing this at home and found myself needing to learn more about the technique, I read some stuff on the internet. Including a rather critical article, The Scourge Of Pour-Over Coffee, which calls the technique “a gastronomical ascot whose chief benefit seems to be that it roughly triples the time it takes to make a cup of coffee and allows consumers to then imagine that they can taste a difference.” Yet the author goes on to admit that it does taste different. His main quibble seems to be that it takes up unnecessary time when you go out to buy a cup of coffee in a bustling city. Sure, it does. I ordered my first cup of professionally-made pour-over coffee recently. I had to wait. But I expected that. In my mind, it’s the difference between getting take-out and going to a sit-down meal. Both are valid choices, and you should have different expectations for the two. If you’re going to pay someone (and yes, the pour-over coffee I bought cost more) to go through this by-hand process, you should expect to wait, and not see that as a burden. In my opinion.

And do I think there’s a difference in flavor? Maybe. I’m too new to coffee to be sure. I do know that the pour-over coffee I’ve had, both at home and out, is the only coffee I’ve ever had that I’m willing to drink black. Maybe that’s because it’s good coffee; maybe it’s the preparation method. What I know is that I like it, and that it’s the perfect method for my one-cup-at-a-time habit and enjoyment of doing things by hand.

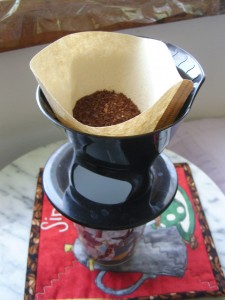
For instructions, I recommend Googling something like “pour-over coffee method”. I’m still too experimental with my own methods to lay down a recommendation for you. What I will say is that you’ll see a variety of level of detail and precision in the instructions you find. You can get way into this, and buy a special ($30+) pouring kettle that will make a very fine stream of water that you can pour very accurately…I found that the spout on my little coffee pot (pictured below) works well enough for me.  You can use a kitchen scale, if you want, to make sure the ratio of coffee grounds to water is spot-on. I did this once. Not sure that I care enough to do it every time. In other words, don’t get intimidated by the level of science and art that some people take this to. If you want to get into all of that, awesome. If not, you can still make a tasty cup of coffee. Like the one I’m drinking right now…photographed for you right here.

Grounds in pour-over brewer

Grounds in my pour-over brewer, ready for water

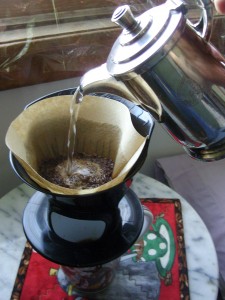
Pouring water

Pouring the water

Brewing

Brewing...

Coffee

Coffee!

Simple Syrup

Simple syrup is a brilliant concoction that I don’t make enough use of. I should make it more, and you should give it a try, too. Tired of stirring and stirring your iced tea, trying to get the sugar to dissolve? Frustrated by an over-baked, dry cake? Simple syrup to the rescue! And it is so simple, indeed, that there’s no need for pictures…but hey, I like pictures. Maybe you do, too. So here we go.

Put equal parts sugar and water into a small saucepan. I used 2/3 cup of each. Some recipes call for a 2:1 ratio of sugar to water; I haven’t tried that. If you have, please let me know how you think it compares.

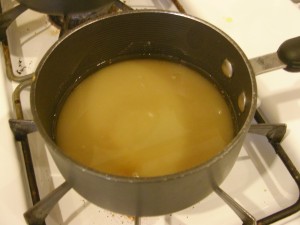
Sugar and water, unheated

Don’t mind the weird lighting. The sugar + water is really all one color. Also, yours might be a different color altogether if you use white sugar (mine is unbleached).

Bring to a boil. Then, swirl or stir to make sure everything’s dissolved. If it’s not, keep swirling. Don’t let it boil too long, though, or you’ll be on your way to making caramel (not what you want).

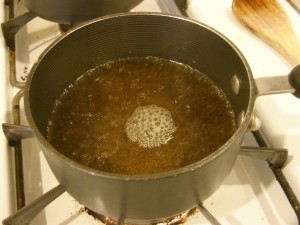
Syrup in saucepan

There we go! Now, take it off the heat. If you’re going to use it to moisten a cake, you can use it right away. Dip a pastry brush in the solution, and brush it on any part of the cake that looks dry (before you add frosting). If you’re going to use it to sweeten coffee/tea or make cocktails, let it cool, then store in an air-tight container in the refrigerator.

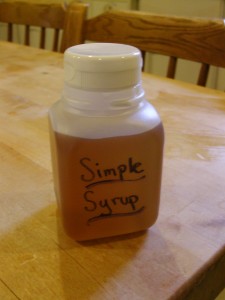
Boom! 2/3 cup simple syrup. Easy as pie. Simple as syrup. 😛

Back in November, I took a brief introductory cheese-making class. It was a two-hour whirlwind, culminating with twenty-five of us standing around six burners making mozzarella in groups of four or five. Chaos! And wouldn’t you know, I forgot to package my little piece of mozzarella properly, and forgot to eat it that night, so I never got to try it. The next day, it was hard as a rock. So, a few months later when the holidays had wrapped up and I decided to try cheese making on my own, mozzarella was the first thing I wanted to experiment with. Little did I know that mozzarella is actually not considered a beginner’s cheese. Nonetheless, I was pretty satisfied with the results, and I wouldn’t dissuade anyone from trying it as their first cheese. That being said, in my subsequent cheese adventures, I’ve backtracked a bit and made some simpler cheeses. Several batches of cream cheese (well, technically Neufchâtel, as I didn’t add any cream); queso blanco; and most recently, cottage cheese.

Supposedly cottage cheese, anyhow. I’m very picky when it comes to store-bought cottage cheese. I like it to have a clean mouth feel. I hate it when it’s cloying. I’ve never found out why it has, or doesn’t have, that cloying quality. I thought it might have to do with the fat content, but I haven’t actually noticed a correlation in the various cottage cheeses I’ve bought. Reluctantly, I try to simply stick to the brands that I know I like. This means I’m kinda at a loss when it comes to making cottage cheese that has the texture I want. The recipes I’ve found online usually have cream added at the end. Some don’t, but then you’re basically making queso blanco all over again (so it seems). When making my first batch of cottage cheese, I decided to split the difference, fearing that adding a hearty portion of cream would result in a cloying cheese.

My cottage cheese turned out tasting, well, not much like any store-bought cottage cheese I’ve had, cloying or not. The texture was completely different. So was the flavor. I’m humbled by my apparent lack of knowledge of fresh cottage cheese; frankly, I don’t know what variables to change to get the cheese I want, especially since I don’t know how different homemade cottage cheese is supposed to taste than store bought, anyway. (The internet says it’s supposed to be different. So who knows if I can even achieve something like the store bought cottage cheese I like – or if I should even be aiming for that. “Should” – as if hobbies are any fun when they’re prescriptive!)

Enough talk. Onto the process and pictures!
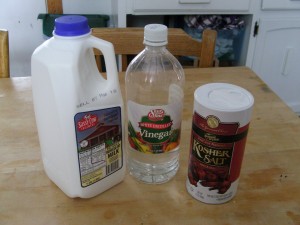
Milk, vinegar, and salt

Ingredients: Milk, white vinegar, salt. Most recipes I’ve seen for home cheese making call for a gallon of milk. I’ve found that this usually makes a lot of cheese. If you’re going to be feeding it to a lot of people, great! But if you’re making fresh cheese, and it will only be consumed by one or two people, you might want to cut your batch in half. This is a half-gallon of 2% milk. (You can use whatever fat content you want. Obviously, fattier milk will make a richer cheese.) Local, pasteurized (not ultra-pasteurized), non-organic (I was saving money that day), homogenized. (Your ideal cheese-making milk is minimally pasteurized (or raw, so I’m told, if you can get it) and non-homogenized.)
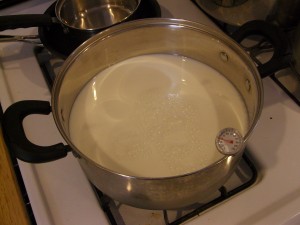
Stockpot with milk

Heat the milk up to 120°F. I’ve got a dinky analog thermometer in my milk, as you can see. It works okay. A digital one might be better. I have a digital thermometer, but it’s a candy thermometer that doesn’t go below 100°, and many cheeses require you to do things below 100°, so I use this analog one for cheese. You can get a digital one that goes lower. Someday, I will.
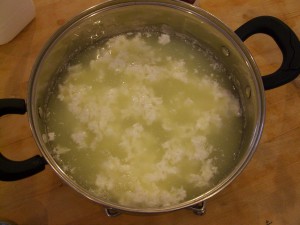
Curds forming after adding vinegar

Take it off the heat after it reaches 120°, and add 3/8 cup vinegar. Stir for a minute or two. You should see the whey appear – the kinda gross-looking greenish clear liquid. Then put a lid on it and wait for half an hour. During this time…
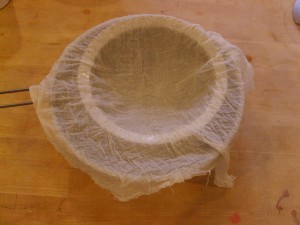
Cheesecloth on strainer over bowl

Set up a large-ish bowl with a strainer over it, and line the strainer with a large piece of cheesecloth. Don’t be cheap and use a small piece of cheese cloth. I learned this the hard way. You don’t want to have your cheese start coming out the sides of your cheese cloth bag later. Also, I hear that butter muslin is way better for actually straining  cheese than cheese cloth (the stuff called cheese cloth is better suited to wrapping up hard cheeses). Unfortunately, I haven’t seen butter muslin at any stores I’ve been to yet, so I’ve been sticking with cheese cloth. And it works decently. You might want to double it, especially if yours has a loose weave. You can get butter muslin on the internet, which I’ll probably do soon.

Since that won’t take half an hour, I recommend now playing with your cat or doing some dishes while you excitedly watch the clock.
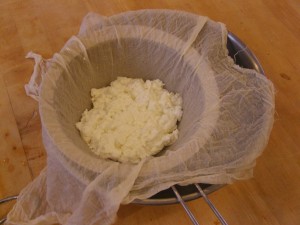
Curds in cheese cloth

Now, ladle your curds carefully into your draining setup. Let the whey drain into the bowl for about three minutes. Then pick up the cheese cloth and tie it into a bag that holds the curds. Run under cool water for another two or three minutes, mushing the curds around with your fingers the whole time, trying to keep them broken up. Untie the bag and release your curds into a bowl…
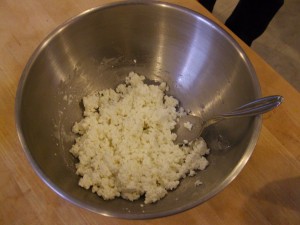
Curds in bowl

Here they are! Your very own curds! Actually, this photo is a little misleading. This is after I added the cream, which is the next step. I took pictures both before and after, but they looked almost identical, so I figured you didn’t need to see them both. Here’s a gratuitous picture of the cream I used:
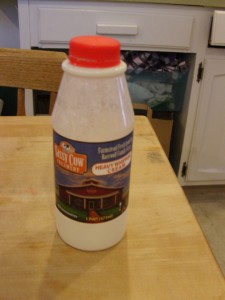
Heavy cream

Sassy Cow cream. I love Sassy Cow. They’re a very, very local dairy here in southern Wisconsin. They have a lot of organic products, but they also have some of their items in a less expensive non-organic version. I am all about buying organic when I can afford it; but if I can’t, I’d rather buy non-organic from a friendly local dairy than non-organic from a large faceless corporation. Also, Sassy Cow makes amazing ice cream. And they are not paying me to say any of this.

So, anyway. Before adding your cream, mix in salt. Then add cream (if you want). I added a couple of tablespoons. You can add however much you feel like.
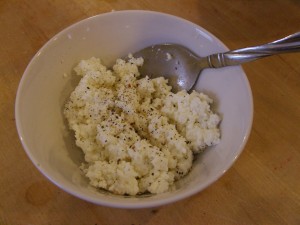
Bowl of cottage cheese

Now, the best part: Put some of your cheese in a bowl. Top with pepper, like I like to do, or mix with whatever you want. YUM. It may not taste anything like store bought cottage cheese, but it is fresh and delicious. Enjoy!

Cottage Cheese

Adapted from several internet recipes, including Alton Brown’s.

  • 1/2 gallon milk
  • 3/8 cup white vinegar
  • 3/4 teaspoons kosher salt
  • 3 tablespoons heavy cream

Pour milk in a large stockpot and heat to 120°. Remove from heat and add the vinegar, stirring for 1 to 2 minutes. Cover and let sit for 30 minutes. Set a cheesecloth-lined strainer over a bowl. After the 30 minutes have passed, ladle the curds into the cheesecloth and let drain for 3 minutes. Pick up the cheesecloth and tie it so that the curds can’t get out. Run the cheesecloth bag under cool water for about 3 minutes, until cool, squeezing and moving the curds throughout so that they stay separated. Squeeze the curds dry, and empty them into a bowl. Stir in salt and cream. Serve as desired!

You can use the leftover whey for various purposes. I made soup with the whey from my first batch of mozzarella. Then I had some gastrointestinal problems, so I’m thinking I might have a slight lactose intolerance (lactose gets concentrated in whey; that’s why some lactose intolerant people can still tolerate cheese; the whey has been drained away). Thus, I don’t save my whey anymore. If you have a garden (I don’t), you can water certain acid-loving plants with it, or so I’m told. Apparently you can also feed it to your pigs. If you don’t have a problem with lactose, whey does make a lovely soup base, or you can use it as a liquid substitute in other recipes.
« Newer Posts